Table of Contents
Step 1: Accessing Metafields in Shopify #
- Log in to your Shopify store.
- In your Shopify Admin, go to the Settings section located at the bottom left of the admin panel.
- In the Settings menu, scroll down and click on Metafields.
Step 2: Navigating to Product Metafields #
- In the Metafields section, you’ll see different areas where you can add metafields (e.g., Products, Variants, Collections, etc.). Select Products since we are adding metafields specifically for product details.
- Once in the Products metafields section, click the Add definition button to start creating your metafields.
Step 3: Setting Up Metafields for Beatifyy Pro #
1. MP3 File #
- Namespace and Key:
audio.tagged - Name: MP3 File
- Type: File
- Validations: Choose to either accept specific file types (e.g., .mp3) or allow all file types.Steps:
- Click Add Definition.
- Enter MP3 File as the Name.
- Set the Namespace and Key to
audio.tagged. - Choose File as the Type.
- In Validations, select Accept specific file types (e.g., MP3) or leave it to accept all file types.
- Click Save.

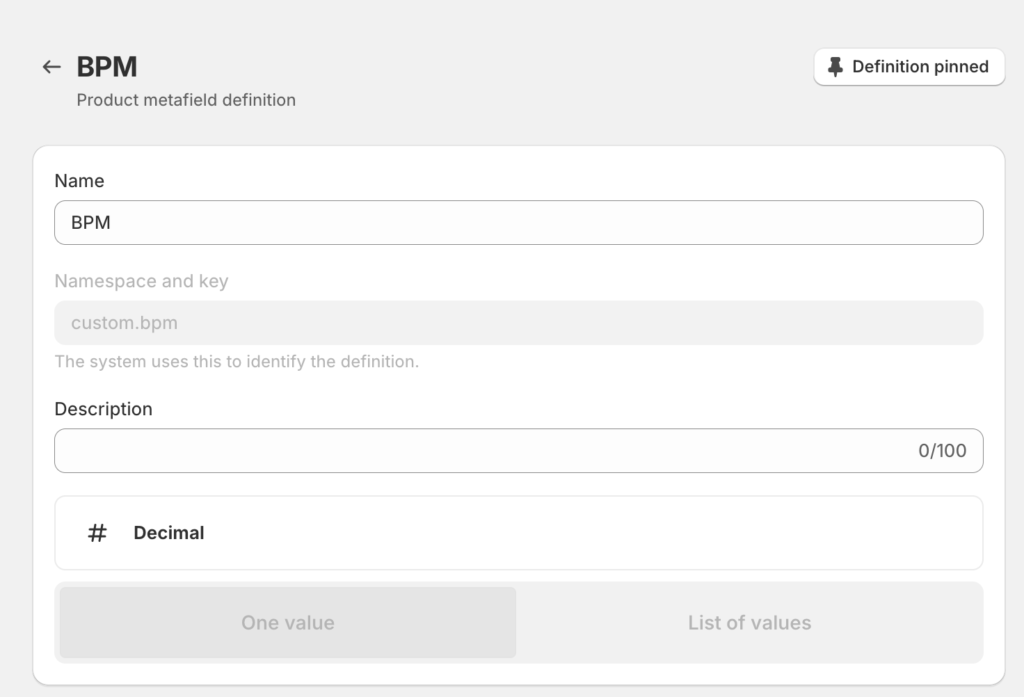
2. BPM #
- Namespace and Key:
custom.bpm - Name: BPM
- Type: Decimal
- Validations: The value must be a number with a decimal.Steps:
- Click Add Definition.
- Enter BPM as the Name.
- Set the Namespace and Key to
custom.bpm. - Choose Decimal as the Type.
- In Validations, ensure it’s set to allow decimal numbers and optionally set a minimum or maximum value.
- Click Save.
3. Genre #
- Namespace and Key:
audio.genre - Name: Genre
- Type: Single line text
- Validations: Values can contain letters, numbers, and special characters.
- Choices: Optionally limit the choices to predefined genres like Afro Beat, Amapiano, Hip Hop, R&B.Steps:
- Click Add Definition.
- Enter Genre as the Name.
- Set the Namespace and Key to
audio.genre. - Choose Single line text as the Type.
- You can limit values to preset choices such as:
- Choice 1: Afro Beat
- Choice 2: Amapiano
- Choice 3: Hip Hop
- Choice 4: R&B
- Click Save.

4. Key #
- Namespace and Key:
audio.key - Name: Key
- Type: Single line text
- Validations: Values can contain letters, numbers, and special characters.
- Choices: Optionally limit the choices to predefined musical keys like C Major, C Minor, D Major, etc.Steps:
- Click Add Definition.
- Enter Key as the Name.
- Set the Namespace and Key to
audio.key. - Choose Single line text as the Type.
- You can limit values to preset choices such as:
- Choice 1: C Major
- Choice 2: C Minor
- Choice 3: D Major
- Choice 4: D Minor
- Click Save.

Step 4: Assigning Metafields to Products #
Click Save.
Once your metafields are created, go to the Products section in your Shopify admin.
Open a product to which you want to assign the metafield values.
Scroll down to the Metafields section at the bottom of the product page.
You’ll see the metafields you created (e.g., MP3 File, BPM, Genre, Key).
Fill in the appropriate values for each metafield (e.g., upload the MP3 file, enter the BPM, select the genre, and choose the key).


